
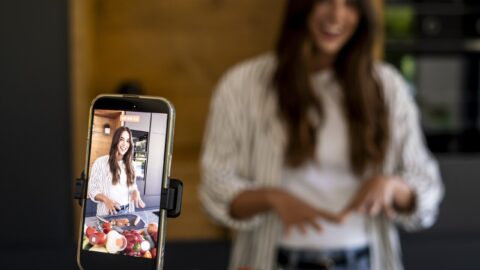
The smartphone in your pocket is actually an incredibly powerful camera if you treat it properly, and it could be the most important piece of kit in your bag.
This guide covers what to do when you’re filming on a smartphone: planning, orientation, composition, lighting, and some of the settings worth changing.
Plan your shoot before you press record
Pre-production is where you save yourself hours in the edit, so knowing what you’re filming before you press record is one of the most important things. It’s also what separates one-off videos from a real content marketing approach. Content that’s planned around a clear message performs better than content that’s had the message sliced together on the editing room floor. A script and a shot list mean you’re not clogging up your phone and cloud storage with unneeded footage.
That said, sometimes planning every second isn’t always possible, and if you’re documenting something as it happens, missing a moment costs you far more than an unused clip does. If you’re filming something as it’s happening (such as interviews or live action) constantly check how the shot looks live but don’t watch the clip back straight away. Keep filming until the subjects have fully stopped, as some of the best footage will be in the off-the-cuff moments.
Choose your orientation before you shoot
Work out where the video will premiere before you press record.
- Landscape (16:9): TV, a website video player such as Vimeo or a traditional YouTube upload.
- Portrait (9:16): TikTok, Instagram Reels and YouTube Shorts.
You should decide this before framing the shot, as cropping a landscape video into portrait in post loses resolution and usually destroys the composition, so shoot right the first time.
It’s not just a technical preference either: vertical video consistently outperforms horizontal on mobile platforms, so getting the orientation right at the point of filming has a real effect on how the content performs once it’s live.
Don’t film everything
When you’ve got full access to a subject or landscape, it’s tempting to pan across everything in one long take, but as a filmmaker you’re guiding the viewer’s eye to tell a story.
Mix wide, medium, and close shots that create variations and keep the eye from getting bored:
- Wide shots set the scene and give context.
- Medium shots put the focus on the subject and their immediate surroundings.
- Close-ups pick out detail, emotion, or a specific action.
Stay on the lookout for unique angles that nobody else has ever seen or considered before. And a practical tip on handling the phone: hold the phone by the corners rather than flat in your palm because it gives you a more solid base, resulting in much smoother pans. Just be sure to keep your fingers out of the way of the lens.
Smooth over shaky
Zooms and camera movement can add energy to a scene that doesn’t have much on its own, but most of the time what you actually want is a video that’s clean and easy to follow.
A gimbal will consistently keep the shot steady and opens up pans that are difficult to get handheld. If you don’t have one, use the human tripod method: tuck your elbows into your ribs, hold the phone at the corners with both hands and move your whole torso to pan rather than just your wrists. It will get you pretty close to a gimbal when paired with the built-in stabilisation of modern phone cameras.
Lighting: less is often more
Beginners tend to assume good lighting means more light, but this is not the case. Your subject should be the best-lit thing in the frame; that’s what the viewer is here for. Overexposure kills a shot by blowing out the highlights, so tap the screen on your subject to lock the exposure and focus before you roll.
Smartphone sensors are extremely small, and even the newest ones still struggle in low light, so light for that limitation instead of fighting it. Make sure your lens is clean before every shot; muck on the glass will cause streaks and cloudy shots and will ruin a shot faster than bad lighting ever will; a quick wipe with a microfibre cloth fixes it straight away.
Good lighting and framing only help if people actually find the video once it’s live, which is where video SEO comes in.
Composition: depth over flat
Composition mostly comes down to two things: lighting and depth. Our eyes want as much variation as possible without being a distraction; therefore, a subject talking flat against a wall loses every time to the same subject shot with a background that has some depth to it.
There are a couple of ways to build that in:
- Give the subject space from the wall and add some background texture
- Add a small light behind the subject to create separation between them and the background.
For talking-head shots, distance matters just as much as depth. You want to frame like you’re having a conversation and not an interrogation or like you’re shouting across the road.
Levelling up your phone
Once you’re past the basics, the Blackmagic Camera app gives you the control and customisation of a cinema camera:
- ISO – controls sensor sensitivity, useful for cutting grain in low light.
- Shutter angle locked at double your frame rate – adds authentic motion blur, which is the easiest step to make your phone not capture like a phone.
Some newer phones can also shoot in Log, which keeps the image flat and holds onto more highlight and shadow detail than a standard profile. It’s worth using when you’ve got the time to grade every clip or you’re after a specific look but for anything with fast turnaround it’s not necessary; but for me personally, if you’ve got the time it’s an important step to making your videos look a lot more professional.
B-roll
If your piece to camera is the A-roll, B-roll is the cutaway footage. It’s the thing you’re talking about that’s shown on screen rather than just talked about.
Moreover, it gives you somewhere to cut filler words without a jump cut showing and illustrates the point you’re making better than a talking head can on its own. If you’re talking about a product, you’re best to actually show the product. It’s also a good place for slow motion and the kind of detail that shows up in some of the best-performing video campaigns.
Compression
Have you ever posted a video that looked great on your phone but the second it hit Instagram it looks like you’ve got sand in your eyes? That’s internet compression. Each platform compacts your file so that it loads fast enough on mobile data, and detail is what gets sacrificed to make that happen. Match your export settings to the platform’s upload requirements, which is usually 1080p and H.264, and you’ll lose far less detail when on the platform.
Audio
Phone microphones are great at picking up all sound within a radius, not just your subject, so if you’re talking, getting a dedicated microphone can help a lot. I prefer a DJI Mini Mic as it’s super easy to use and it isn’t super invasive whilst giving you noticeably cleaner sound. With the newer versions as well, it also has a built-in noise cancellation filter which removes all of that distracting background noise; if this isn’t an option, Apple’s Audio Mix feature helps isolate voice a little, but it’s not a substitute for a separate mic.
Storage
On newer iPhones with USB-C, you can record straight to an external hard drive. It saves your phone’s storage and skips the transfer step afterwards so you can plug the drive straight into your editing software.
Summary
If you take one thing from this: the viewer wants to think about the subject they’re watching and not how it was filmed, so make sure you keep everything as simple and as clean as possible.